Table of Contents
ToggleA bedroom that looks tidy on the surface can still harbor dust mites in the mattress, grime on the baseboards, and allergens in the curtains. Deep cleaning goes beyond the weekly dusting, it tackles the spots most people skip until moving day. This checklist walks through every surface in a bedroom, from ceiling fans to carpet edges, with specific methods and materials that get results. Whether someone’s prepping for allergy season or just reclaiming a neglected guest room, this guide covers the full scope of a bedroom deep clean without the fluff.
Key Takeaways
- Start your deep cleaning bedroom checklist by decluttering all surfaces and gathering supplies like microfiber cloths, all-purpose cleaner, and a vacuum with attachments to work efficiently.
- Work from ceiling to floor—dust ceiling fans with a pillowcase method, wipe walls and crown molding, clean windows and blinds, then tackle baseboards to prevent re-dusting clean areas.
- Strip and wash all bedding in hot water (130°F+) to kill dust mites, vacuum the entire mattress including seams, and spot-treat stains with enzyme cleaner for a hygienic sleeping surface.
- Vacuum or deep-clean floors thoroughly, paying special attention to high-traffic areas and under furniture where allergens accumulate, and consider professional carpet extraction if not cleaned in over a year.
- Replace HVAC filters and clean air vents at the end of your deep clean to improve bedroom air quality and prevent dust recirculation throughout your home.
Pre-Cleaning Preparation and Decluttering
Deep cleaning a cluttered room wastes time and misses dirt hiding under piles. Start by clearing every horizontal surface, nightstands, dressers, chairs, and the floor. Remove everything that doesn’t belong in the bedroom: dishes, laundry baskets headed for other rooms, random tools, and expired magazines.
Sort items into three categories: keep, donate, and trash. Be ruthless with the middle pile, clothes that haven’t been worn in a year, broken electronics, and duplicate items should leave the room. This isn’t a decluttering seminar, but a clean bedroom needs breathing room.
Gather supplies before starting. A basic kit includes:
• Microfiber cloths (at least six, they’ll get dirty fast)
• All-purpose cleaner and glass cleaner
• Vacuum with attachments (crevice tool, upholstery brush, and extension wand)
• Baking soda and white vinegar
• Spray bottle for DIY solutions
• Step ladder or sturdy stool for high surfaces
• Trash bags and a laundry hamper
Wear safety gear appropriate to the task. A dust mask or N95 respirator protects lungs when vacuuming or handling dusty textiles. Latex or nitrile gloves keep hands clean when scrubbing.
Open windows if weather permits, ventilation speeds drying and clears airborne dust. If using any commercial cleaners with strong fumes (bleach-based products, ammonia solutions), cross-ventilation isn’t optional.
Ceiling, Walls, and High Surfaces
Dust and cobwebs settle on surfaces people rarely look at. Start at the ceiling and work down, this prevents clean areas from getting re-dusted.
Ceiling fans and light fixtures collect a surprising amount of grime. Turn off the power at the switch (not just the pull chain). For ceiling fans, use a pillowcase slipped over each blade, pull it back toward the hub to trap dust inside the fabric instead of showering it onto the bed. Wipe the motor housing and downrod with a damp microfiber cloth.
Light fixtures and pendant shades need individual attention. Glass globes can be removed, washed in warm soapy water, and dried completely before reinstalling. Fabric shades get vacuumed with the upholstery brush attachment, water can stain or warp them.
Crown molding and top edges of door frames trap dust in the profile details. A microfiber cloth wrapped around a putty knife or drywall knife reaches into crevices without scratching. For tall ceilings, a microfiber duster on an extension pole simplifies the job and eliminates the need to move a ladder constantly.
Walls themselves get overlooked until someone notices the light switch plate. Flat or eggshell paint can be spot-cleaned with a barely-damp cloth and mild detergent, too much moisture damages the finish. Test in an inconspicuous corner first. Satin and semi-gloss paints tolerate more moisture. Focus on areas around light switches, door handles, and headboard contact points where oils from hands leave residue.
Smudges and scuffs respond to a magic eraser (melamine foam), but use it sparingly, it’s mildly abrasive and can burnish flat paint to a sheen if overworked. For stubborn marks, a paste of baking soda and water applied with a soft cloth works without harsh chemicals.
Windows, Blinds, and Curtains
Windows and window treatments filter outdoor allergens and accumulate indoor dust. Cleaning them improves air quality and lets in more natural light.
Blinds are dust magnets. For horizontal blinds (Venetian style), close them fully in one direction and wipe each slat with a microfiber cloth dampened with water or all-purpose cleaner. Flip them the opposite direction and repeat. Vertical blinds can be vacuumed with the brush attachment, working top to bottom. For grimy blinds, take them down and hose them off outside or in a bathtub, then air-dry completely before rehanging to avoid mildew.
Curtains and drapes depend on fabric type. Check care labels, most machine-washable curtains can go through a gentle cycle in cold water with mild detergent. Hang them damp to minimize wrinkles (the weight of the wet fabric pulls out creases). Dry-clean-only fabrics should be vacuumed with the upholstery attachment and spot-treated if necessary. Some effective cleaning strategies include steaming heavy drapes in place with a garment steamer to refresh fabric without a full wash.
Window glass benefits from a two-step process. First, wipe away dust and loose debris with a dry microfiber cloth. Then spray glass cleaner (or a 1:1 mix of white vinegar and water) and wipe with a clean cloth in overlapping strokes. For streak-free results, buff with crumpled newspaper or a dedicated glass towel, paper towels leave lint.
Don’t skip the window tracks and sills. Vacuum out loose dirt with the crevice tool, then scrub with an old toothbrush dipped in all-purpose cleaner. Tracks accumulate dead insects, pet hair, and grit that can interfere with operation. Wipe dry to prevent moisture damage to wood sills.
Bedding, Mattress, and Furniture Deep Clean
The bed is the room’s centerpiece and the most-used surface. It deserves more than a quick sheet change.
Strip and Wash All Bedding
Remove everything: sheets, pillowcases, duvet covers, blankets, mattress protectors, and bed skirts. Most cotton and poly-blend bedding tolerates hot water (130°F or higher) which kills dust mites. Check care tags first, some fabrics like linen or bamboo rayon require warm or cold water to prevent shrinkage.
Wash pillows if the care label allows it (most synthetic-fill and some down pillows are machine washable). Use a gentle cycle with an extra rinse to remove all detergent. Dry with wool dryer balls or clean tennis balls to prevent clumping. Pillows that can’t be washed should be tumbled on high heat for 20 minutes to kill dust mites, then fluffed and aired out. Replace pillows every 1-2 years, flattened or lumpy pillows don’t support the neck properly and harbor allergens.
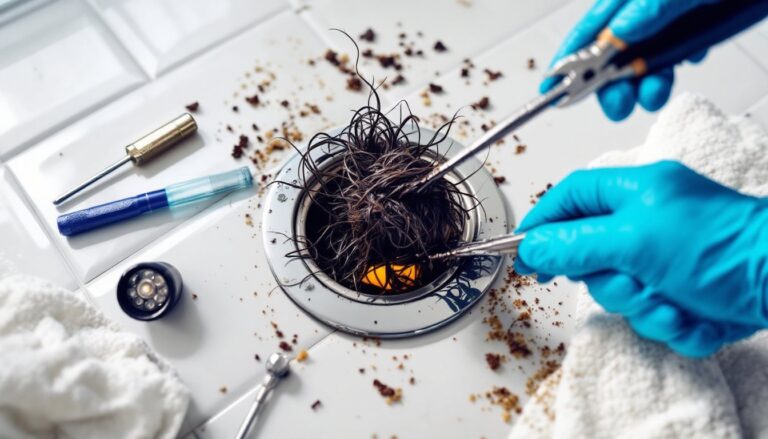
Mattress Vacuuming and Deodorizing
With the bedding off, inspect the mattress for stains, odors, or signs of wear. Use the upholstery attachment on the vacuum and work in overlapping strips across the entire top surface, sides, and (if accessible) the bottom. Pay attention to seams and tufted areas where dust and skin cells collect. Recent studies on mattress hygiene from experts note that mattresses can double in weight over 10 years from accumulated debris if not regularly cleaned.
For odors or freshening, sprinkle a thin, even layer of baking soda over the mattress surface. Let it sit for at least 15 minutes (longer is better, a few hours if the room can be closed off). Baking soda absorbs moisture and neutralizes smells. Vacuum it up thoroughly.
Spot-clean stains with an enzyme cleaner designed for biological stains (sweat, urine, blood). Spray lightly, over-wetting a mattress can lead to mold growth inside the foam or coils. Blot with a clean, dry towel and allow the mattress to air-dry completely before remaking the bed. A fan or open window speeds the process.
Furniture needs attention too. Vacuum upholstered headboards, chairs, and benches with the upholstery brush. For wooden furniture, dust with a microfiber cloth, then clean with a wood-appropriate cleaner or a damp cloth with a drop of dish soap. Avoid soaking wood, it can raise the grain or damage the finish. Wax or polish wood furniture according to the manufacturer’s recommendation, typically 2-4 times per year. Don’t forget to pull dressers and nightstands away from the wall and clean behind them, dust bunnies, dropped items, and even pest evidence can hide back there. When applying practical cleaning tips, moving furniture reveals spots that otherwise stay dirty for years.
Floors, Baseboards, and Final Touches
Floors bear the brunt of foot traffic, pet dander, and settled dust. Baseboards frame the room and show dirt instantly when someone looks down.
Baseboards collect dust, pet hair, and scuff marks. Vacuum them first with the brush attachment to remove loose debris, then wipe with a cloth dampened with all-purpose cleaner. For textured or grooved baseboards, an old toothbrush scrubs grime out of the details. If baseboards are painted, a magic eraser removes scuffs without repainting, but test it in a hidden spot first to avoid removing paint along with the mark. Homes with top cleaning tips often recommend a quick baseboard wipe monthly to prevent buildup.
Vacuum or sweep the floor thoroughly before mopping. Use the crevice tool along edges, under furniture, and in corners where dust collects. For carpeted bedrooms, go over high-traffic areas twice in different directions to lift embedded dirt. If the carpet hasn’t been deep-cleaned in over a year, consider renting a carpet extractor or hiring a professional, vacuuming alone can’t remove ground-in soil or allergens. Area rugs can be taken outside, hung over a railing, and beaten with a broom handle to dislodge deep dirt, then vacuumed.
Hard floors (wood, laminate, tile, vinyl) each have different cleaning needs. For hardwood, use a damp (not wet) mop with a pH-neutral hardwood cleaner, excess water can warp boards or damage the finish. Laminate tolerates slightly more moisture but should still be damp-mopped, never soaked. Tile and vinyl are more forgiving: mop with warm water and a mild detergent, paying attention to grout lines. A grout brush or an old toothbrush with a paste of baking soda and water brightens dingy grout.
Finish by replacing air vent covers and return grilles that were removed for cleaning. Wipe them down with a damp cloth or run them through the dishwasher if they’re metal. Vacuum the duct opening with the crevice tool to capture visible dust, but full duct cleaning requires a professional with specialized equipment.
Replace HVAC filters if they’re dirty or past the 30-90 day replacement interval marked on the frame. A clogged filter recirculates dust and reduces system efficiency. This small step improves air quality for the entire house, not just the bedroom.
As a final check, walk the room’s perimeter and look for missed spots: corners with cobwebs, streaks on mirrors, dust on picture frames, or fingerprints on door hardware. Wipe them down. Stand in the doorway and scan the space at different heights, people notice what’s at eye level, so light switches, mirrors, and wall art should be spotless. These cleaning ideas make the difference between a room that’s technically clean and one that feels truly refreshed. Additional resources on home cleaning routines from trusted sources and organization strategies offer ongoing guidance for maintaining the results long-term.