Table of Contents
ToggleWater pooling in your footwells or a damp headliner after a rainstorm? Before you panic about a cracked sunroof seal, check the drains. Most sunroofs have four drain tubes, one at each corner, that channel water down through the A-pillars or C-pillars and out underneath the vehicle. When these drains clog with leaves, pollen, or debris, water backs up and finds its way into your cabin, potentially causing hundreds or thousands of dollars in damage. The good news? Cleaning sunroof drains is a straightforward maintenance task that takes about 30 minutes and requires minimal tools. This guide covers everything you need to know about sunroof drain cleaning tools and how to use them effectively.
Key Takeaways
- Clogged sunroof drains are a preventable cause of interior water damage that can cost hundreds to thousands of dollars if ignored, making regular cleaning essential maintenance.
- A sunroof drain cleaning tool clears blockages from the narrow tubes running from your sunroof cassette to the undercarriage in about 30 minutes with minimal equipment and expertise.
- Watch for warning signs like water dripping from the headliner, damp carpeting, musty odors, and standing water in the sunroof track—test drains by pouring water into each corner to identify clogs early.
- Flexible wire tools ($10–$30) are affordable and effective for most DIY cleanups, while compressed air works best as a follow-up method; avoid rigid metal hangers that risk puncturing drain tubes.
- Clean all four drain openings (front and rear corners) at least once or twice yearly, or quarterly if you park under trees, and confirm water flows freely from exit points under the vehicle to prevent mold and electrical damage.
What Is a Sunroof Drain Cleaning Tool and Why You Need One
A sunroof drain cleaning tool is a specialized device designed to clear blockages from the narrow drain tubes that run from your sunroof cassette down to the vehicle’s undercarriage. These tubes are typically 3/8 to 1/2 inch in diameter and can stretch anywhere from three to six feet, depending on your vehicle’s design.
Most cleaning tools fall into two categories: flexible wire or cable-based tools that physically dislodge debris, and compressed air tools that blow blockages clear. Some DIYers improvise with weed trimmer line or speedometer cable, but purpose-built tools offer better control and reduce the risk of puncturing the drain tube, a mistake that can turn a $10 fix into a $300+ replacement.
Why bother? Because clogged sunroof drains are one of the most common, and most preventable, causes of interior water damage. When drains back up, water seeps into your headliner, saturates carpeting, and can even reach electronic modules hidden under seats or in door panels. Mold and mildew follow quickly, especially in humid climates. Regular cleaning (once or twice a year, or quarterly if you park under trees) keeps water flowing where it belongs and protects your investment.
Signs Your Sunroof Drains Need Cleaning
Sunroof drain clogs don’t always announce themselves immediately. Here’s what to watch for:
- Water dripping from the headliner or A-pillar trim after rain or a car wash, even when the sunroof is closed.
- Damp or wet carpeting in the front or rear footwells with no obvious source (like a leaking door seal).
- Musty odors inside the cabin, particularly after humid or rainy weather.
- Visible standing water in the sunroof track or cassette when you open the panel.
- Stains or discoloration on the headliner fabric near the sunroof edges.
To test your drains without waiting for a storm, pour a small amount of water (about a cup) into each corner of the sunroof tray with the panel open. Water should disappear almost immediately. If it pools or drains slowly, you’ve got a blockage. Trace where the water exits under the vehicle, most drains empty near the front wheel wells or just behind the rear wheels. If water doesn’t come out at all, the clog is significant.
Don’t ignore early warning signs. A minor clog today becomes a major problem once water finds alternate routes through your cabin’s wiring harnesses and insulation. Many home maintenance checklists recommend seasonal inspections of all vehicle drain systems, including sunroofs, A/C condensate drains, and door weep holes.
Types of Sunroof Drain Cleaning Tools Available
Flexible Wire and Cable Tools
Flexible wire tools are the most common and affordable option for clearing sunroof drains. These typically consist of a semi-rigid plastic or coated metal cable, 24 to 36 inches long, with a small bulb or brush tip to push through debris without puncturing the drain tube.
Trimmer line (the kind used in string trimmers) works in a pinch, look for .065 to .080 diameter line, which is stiff enough to push through clogs but flexible enough to navigate bends. Cut a length about three feet long and feed it gently down the drain. Some DIYers prefer speedometer cable salvaged from auto parts, which offers more rigidity for stubborn blockages.
Purpose-built kits often include multiple diameter tips and a flexible shaft that can reach the full length of the drain tube. Prices range from $10 to $30. The advantage? These tools are designed specifically for the task, with rounded tips that won’t catch on tube seams or poke through worn rubber hoses. If you’re working on multiple vehicles or maintaining a fleet, the investment pays off quickly.
One caution: avoid using metal coat hangers or rigid wire. Sunroof drain tubes often have bends and connections that can snag or tear if you’re too aggressive. The repair typically involves dropping the headliner and replacing sections of tube, an afternoon project that’s best avoided.
Compressed Air and Pneumatic Options
Compressed air offers a faster, non-contact method for clearing drains, but it comes with trade-offs. A standard air compressor set to 30-40 PSI can blow out loose debris without inserting anything into the tube. Some technicians use a blow gun with a rubber tip to create a seal at the drain opening, directing all the air pressure down the tube.
The step-by-step approach for using compressed air involves sealing the drain opening, applying short bursts of air, and checking for debris exiting at the bottom. Never exceed 50 PSI, too much pressure can separate tube connections inside the headliner or door panels, creating leaks that are difficult to trace and repair.
Canned air (the kind used for cleaning electronics) isn’t powerful enough for serious clogs but works well for preventive maintenance. It’s safe for quick cleanings and won’t risk damage from excessive pressure.
The downside? Compressed air won’t clear a packed blockage the way a physical tool can. If leaves or pine needles have formed a dense plug, you’ll need to use a flexible wire tool first, then follow up with air to clear remaining debris. Some DIYers combine both methods: push the blockage partway down with a wire tool, then use air to finish the job.
How to Clean Your Sunroof Drains Step-by-Step
Before you start, gather your tools and materials:
- Flexible wire cleaning tool or trimmer line (24-36 inches)
- Compressed air (optional, 30-40 PSI)
- Shop towels or rags
- Small funnel (optional, for testing)
- Water bottle or pitcher (for testing drains)
- Safety glasses (debris can fly when clearing blockages)
Step 1: Locate the Drains
Open your sunroof fully. You’ll see a shallow tray or cassette with small drain holes in each corner, typically about the size of a pencil eraser. These are the entry points. Some vehicles have only two drains (front corners), while most have four (front and rear). Consult your owner’s manual if you’re unsure.
Step 2: Clear Visible Debris
Use your fingers or a shop towel to remove any leaves, dirt, or gunk sitting in the sunroof tray. Don’t push debris into the drain openings, pull it out. Wipe the entire tray clean so you’re not working around loose material that can clog the drains again immediately.
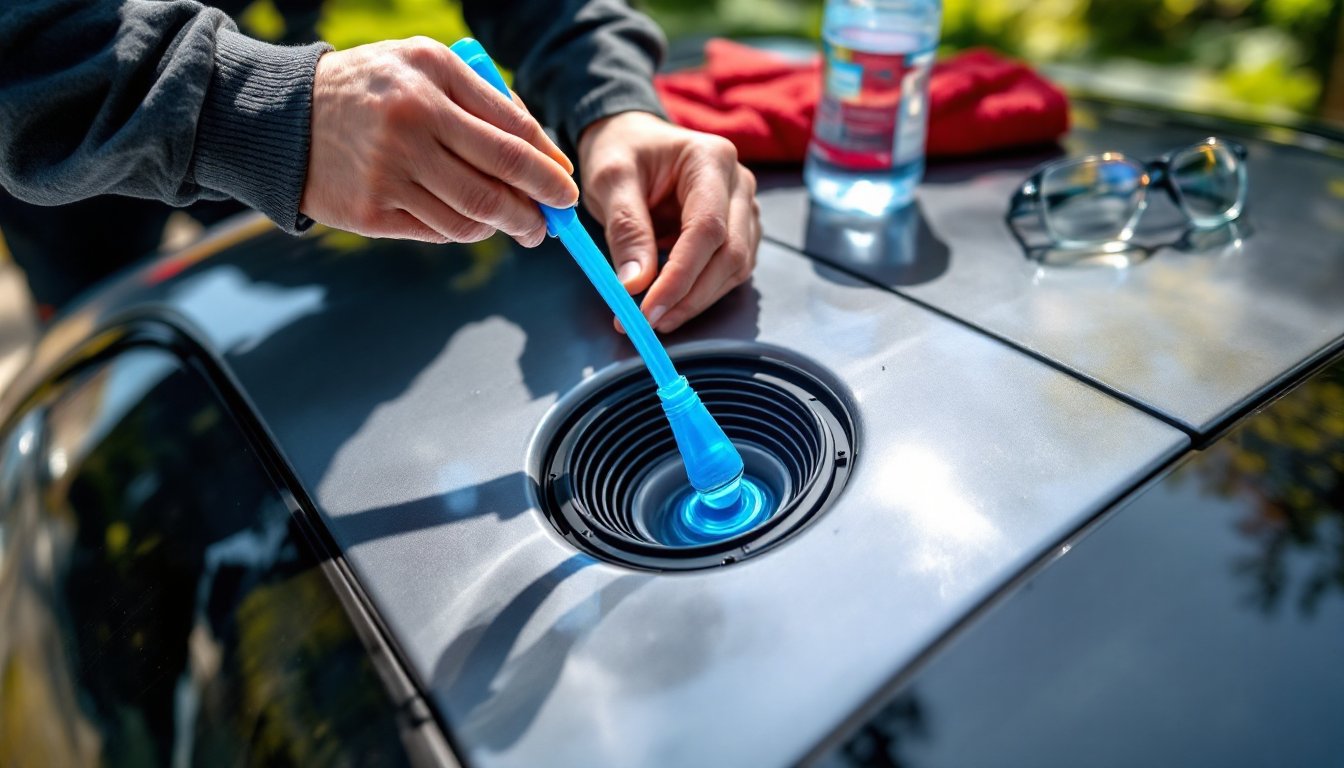
Step 3: Insert the Cleaning Tool
Feed your flexible wire or trimmer line into the drain opening, working gently. You should feel the tool navigate bends as it travels down through the pillar. Push slowly, if you meet firm resistance, you’ve hit the clog. Apply steady pressure to work through it, but don’t force it. If the tool won’t advance, try rotating it slightly or pulling back a few inches before pushing again.
Most clogs sit within the first 12 to 18 inches of the tube, where debris collects after entering the drain. Once you break through, the tool should slide more easily to the exit point. For vehicles with longer drains, you may need to work from both ends, top and bottom, to clear the entire length.
Step 4: Flush with Water
Once the tool passes through, pour about a cup of water into the drain opening. It should flow freely and exit under the vehicle within a few seconds. Have someone watch the exit point (usually near the wheel well) to confirm water is coming out clean. If it drains slowly or not at all, repeat the cleaning process.
Some detailed tutorials recommend adding a small amount of soapy water to the final flush, which can help dissolve oily residues and keep tubes clearer longer. Avoid harsh chemicals, rubber drain tubes can degrade over time if exposed to solvents.
Step 5: Repeat for All Drains
Don’t skip the rear drains if your vehicle has them. Rear drains are just as prone to clogging but often get overlooked because leaks may not be as obvious, water can soak into rear carpeting or spare tire wells without immediate signs in the cabin.
Step 6: Apply Compressed Air (Optional)
If you have access to an air compressor, follow up with short bursts of 30-40 PSI air down each drain. This clears any remaining fine debris and verifies the path is fully open. Use a rubber-tipped blow gun to create a seal at the drain opening and direct pressure down the tube, not back into your face.
Step 7: Test and Inspect
Close the sunroof and pour a generous amount of water across the closed glass panel. Open it slightly and check that water flows into the tray and down the drains without pooling. Inspect under the vehicle to confirm all drains are exiting properly. If one side drains faster than the other, that slower drain may have a partial blockage, repeat the cleaning process.
Safety note: Always wear safety glasses when using compressed air or working overhead. Debris can dislodge suddenly and fly out of the drain opening. If you’re working in a garage, ensure adequate ventilation, mold and mildew from old blockages smell unpleasant and can trigger respiratory irritation.
Conclusion
Cleaning your sunroof drains is one of those simple maintenance tasks that prevents disproportionately expensive problems. A $15 tool and 30 minutes of effort can save you from interior water damage, mold remediation, and electrical repairs that run into the hundreds or thousands. Make it part of your seasonal vehicle maintenance routine, especially if you park under trees or live in a high-pollen area, and your cabin will stay dry no matter how hard it rains.