Table of Contents
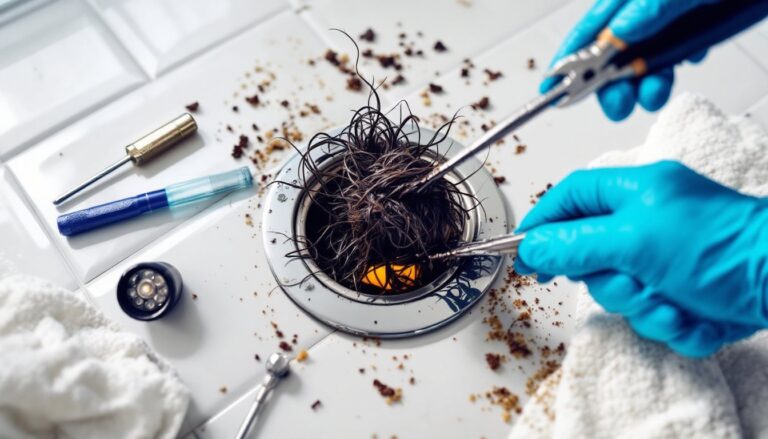
ToggleA clogged drain is one of those household problems that shows up at the worst possible moment, right before guests arrive or when the dishwasher’s mid-cycle. While plungers and chemical drain cleaners get most of the attention, there’s a more effective tool that deserves a spot in every DIYer’s arsenal: the drain cleaning bladder. Also called a blow bag or expansion nozzle, this simple rubber device attaches to a garden hose and uses water pressure to blast through clogs that snakes and plungers can’t touch. It’s particularly useful for main line clogs, bathtub backups, and floor drains where traditional methods fall short. Understanding when and how to use one can save hundreds in plumber calls.
Key Takeaways
- A drain cleaning bladder uses water pressure to blast through stubborn clogs that plungers and snakes cannot clear, making it effective for main line clogs, bathtub backups, and floor drains.
- Drain cleaning bladders come in small, medium, and large sizes designed for different pipe diameters—measure your drain opening before purchasing to ensure proper sealing and effectiveness.
- Choose a drain cleaning bladder made from heavy-duty rubber with solid brass fittings rated for at least 80 PSI, and expect to spend $12 to $25 for a quality unit that will last years with proper care.
- Always wear safety gear, start with low water pressure and increase gradually, and never leave the bladder unattended or use it on damaged pipes, toilets, or immediately after chemical drain cleaners.
- Proper maintenance—including rinsing after each use, air-drying completely, and storing separately from the hose—extends a drain cleaning bladder’s lifespan to 3 to 5 years.
- For recurring clogs, a drain cleaning bladder can indicate deeper plumbing issues like bellied pipes or root intrusion that may require professional drain cleaning services to fully resolve.
What Is a Drain Cleaning Bladder and How Does It Work?
A drain cleaning bladder is a heavy-duty rubber bag, typically 4 to 6 inches long, that expands when filled with water. One end features a threaded brass fitting that screws onto a standard garden hose, while the other end is closed and rounded.
When you insert the bladder into a clogged drain and turn on the water, it inflates to seal against the pipe walls, usually expanding to fit 2-inch to 6-inch diameter drainpipes. Once sealed, water pressure builds behind the clog and releases in pulsing jets that push the obstruction downstream. Most bladders work on residential water pressure of 40 to 80 PSI, though they’re designed to handle surges without bursting.
The expansion creates a tight seal that prevents backflow, directing all the force forward into the clog. Unlike a plunger that relies on suction and compression, or a snake that physically breaks up blockages, a bladder uses hydraulic force. This makes it especially effective against clogs caused by grease buildup, paper products, or organic matter that has compacted over time.
The bladder doesn’t require chemicals, so it won’t damage pipes or introduce caustic substances into your plumbing system. It’s a purely mechanical solution that leverages your home’s existing water supply.
When to Use a Drain Cleaning Bladder vs. Other Methods
A drain bladder isn’t the right tool for every situation. Use it when you’re dealing with a complete or near-complete blockage in floor drains, bathtub drains, or main sewer lines where a plunger has failed.
It’s particularly effective for:
- Main line clogs between the house and the street, especially those caused by tree roots or sediment buildup
- Floor drains in basements or garages that back up during heavy use
- Bathtub and shower drains where hair and soap scum create dense blockages beyond the trap
- Laundry standpipes that drain slowly due to lint and detergent residue
Don’t use a bladder in:
- Kitchen sinks with garbage disposals (the bladder can damage disposal components)
- Toilets (the trap configuration makes proper sealing impossible)
- Drains with known pipe damage, cracks, or weak joints, the pressure can worsen the problem
- Vent pipes or any upward-facing drain opening
For partial clogs where water still drains slowly, start with a plunger or manual drain snake. If those fail and you’re confident the pipes are in good condition, the bladder is the next step before calling a professional. Professional drain cleaning services typically start around $150 to $300, so a $15 bladder is worth attempting first on appropriate clogs.
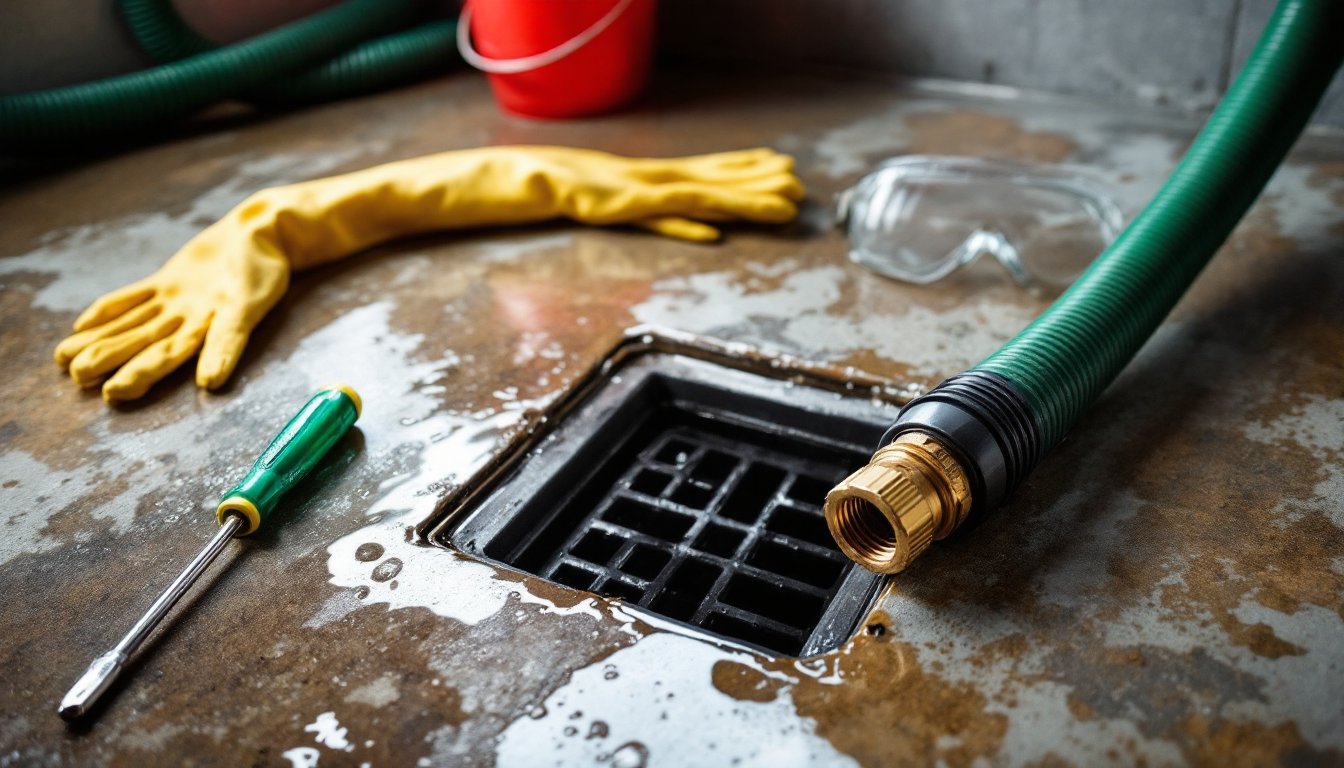
Step-by-Step Guide to Using a Drain Cleaning Bladder
Before starting, put on safety goggles and rubber gloves. You’ll be working with pressurized water and potentially contaminated drain contents.
Preparation
-
Remove the drain cover or strainer. Use a screwdriver if it’s secured with screws. Set hardware aside where it won’t get lost.
-
Clear standing water if the drain is completely backed up. Use a wet/dry vacuum or bucket to remove excess water, you want visibility into the drain opening.
-
Inspect the pipe opening. Look for visible obstructions you can remove by hand (hair clumps, debris). A flashlight helps here.
-
Thread the bladder onto your garden hose. Hand-tighten the brass fitting: you don’t need pliers. Make sure the connection is snug to prevent leaks under pressure.
Operation
-
Insert the bladder into the drain opening. Push it down as far as it will go, typically 6 to 12 inches into the pipe. The bladder should sit firmly in the drain, not just resting on top.
-
Turn on the water slowly. Start at low pressure and gradually increase. You’ll feel the hose stiffen as the bladder expands and seals against the pipe walls.
-
Monitor the bladder. It should inflate and hold position. If water backs up around the bladder immediately, the seal isn’t complete, reposition it deeper or try a larger size bladder.
-
Let water pressure build for 30 to 60 seconds. You may hear gurgling or rushing water as the clog begins to break apart. The bladder will pulse and release water in surges.
-
Turn off the water. Let the bladder deflate, then remove it from the drain. Check if water flows freely.
-
Repeat if necessary. Stubborn clogs may require 2 to 3 cycles. If there’s no improvement after three attempts, the blockage may be too severe or located beyond the bladder’s effective range.
Cleanup
-
Run hot water through the drain for several minutes to flush away remaining debris.
-
Replace the drain cover and hardware.
Important: Never leave a bladder unattended while water is running. Over-pressurization can damage pipes, particularly older galvanized steel or thin-wall PVC.
Choosing the Right Drain Bladder for Your Plumbing
Drain bladders come in several sizes and configurations. Choosing the wrong one means poor sealing and ineffective clog removal.
Size by pipe diameter:
- Small bladders (1.5 to 3 inches) fit lavatory sinks and small floor drains
- Medium bladders (2 to 4 inches) handle most residential drains, including bathtubs and laundry standpipes
- Large bladders (3 to 6 inches) are designed for main sewer lines and commercial-grade drains
Measure your drain opening with a tape measure or calipers before purchasing. If you’re unsure, a medium bladder offers the most versatility for typical household clogs.
Material quality matters. Look for bladders made from heavy-duty rubber (not thin vinyl) with reinforced construction. Cheaper models can rupture under normal water pressure, especially if they encounter a hard clog.
The brass fitting should be solid brass, not plated steel, which can corrode and seize onto your hose. Check that threads match standard garden hose fittings (3/4-inch GHT in the US).
Pressure ratings: Residential bladders should be rated for at least 80 PSI. Some commercial models handle up to 150 PSI, but that’s overkill for home use and increases the risk of pipe damage.
Popular models include the General Pipe Cleaners Drain King (available in multiple sizes) and BrassCraft drain bladders. Expect to pay $12 to $25 for a quality unit. Avoid no-name imports under $10, they’re often made from substandard materials that fail on first use.
Safety Tips and Common Mistakes to Avoid
Drain bladders are simple tools, but misuse can cause serious problems.
Always wear eye protection. If the bladder slips out of the drain or the seal fails, you’ll get hit with pressurized water and drain contents. Rubber gloves protect against bacteria and sharp debris.
Never exceed your home’s water pressure. If you have a pressure regulator, know its setting. Most residential systems run 50 to 70 PSI. If your pressure exceeds 80 PSI, consider installing a regulator before using a bladder, high pressure can split pipes at weak joints.
Don’t use a bladder on fragile or damaged pipes. Older clay sewer lines, corroded cast iron, or PVC with visible cracks can rupture under hydraulic pressure. If you know your plumbing is compromised, call a professional.
Avoid using the bladder too close to fixtures. Insert it into the main drain line, not directly into a sink or tub trap. The curves in P-traps prevent proper sealing and can cause the bladder to blow back out.
Common mistakes:
- Turning water on full blast immediately. Start slow and increase pressure gradually. Sudden pressure spikes can damage pipes.
- Leaving the bladder unattended. Always monitor operation. If the clog doesn’t clear in 60 seconds, turn off the water and reassess.
- Using a bladder on a toilet. The trap design makes this ineffective and messy. Use a closet auger instead.
- Ignoring recurring clogs. If the same drain backs up repeatedly after bladder treatment, there’s likely a deeper issue, bellied pipe, root intrusion, or structural damage. That’s when many homeowners explore professional drain cleaning to address underlying problems.
Chemical warning: Never use a drain bladder immediately after pouring chemical drain cleaner. If the clog doesn’t clear, pressurized water can spray caustic chemicals back at you. Wait at least 24 hours and flush with water before using a bladder.
Maintaining Your Drain Bladder for Long-Term Use
A well-maintained bladder can last years. Neglect will shorten its lifespan to a few uses.
After each use:
-
Rinse the bladder thoroughly with clean water, inside and out. Drain debris contains bacteria that can degrade rubber over time.
-
Inspect for damage. Look for cracks, tears, or weak spots in the rubber. Check the brass fitting for corrosion or cross-threading. Replace the bladder if you find any damage, a ruptured bladder mid-use is a mess.
-
Let it air dry completely before storage. Moisture trapped in the folds encourages mold and accelerates rubber deterioration.
-
Store in a cool, dry location away from direct sunlight. UV exposure breaks down rubber compounds. A basement shelf or garage cabinet works well.
Don’t store the bladder while still attached to the hose. The brass threads can corrode together, making removal difficult later. Keep it separate and only connect before use.
Lubricate the threads of the brass fitting once or twice a year with a thin coat of plumber’s grease. This prevents seizing and makes attachment easier.
Replace every 3 to 5 years even with light use. Rubber degrades over time regardless of visible wear. If the bladder feels stiff, brittle, or sticky, it’s past its prime.
For homeowners who prefer different methods to clean clogs, a bladder remains a valuable backup option when plungers and snakes don’t cut it. Proper storage ensures it’s ready when you need it.
Conclusion
A drain cleaning bladder won’t solve every plumbing problem, but it’s an effective, affordable tool for clearing stubborn clogs that resist plungers and snakes. For less than $25 and ten minutes of work, it can save a costly service call on main line or floor drain backups. Just remember to match the bladder size to your pipe diameter, start with low water pressure, and never use it on damaged plumbing or toilets. Keep one stored properly, and you’ll have a reliable solution ready the next time a drain backs up.